


As a marketer, one of many causes I feel it’s enjoyable to work in electronic mail is that not solely are we sending messages, however we’re additionally receiving them. Being on either side is an effective way to realize perspective as to what these in your listing are experiencing.
Because of this, I’m going to speak about whitelists from two distinctly totally different views:
- As a recipient of electronic mail advertising and marketing.
- As a marketer sending electronic mail.
Right here’s a current instance that exhibits why that is necessary: Simply this week, I went on the lookout for a purchase order affirmation for a small Sago palm that I’d ordered on-line. It ought to have been in my inbox … however I couldn’t discover it. I used to be interested in when my plant would arrive — and I hoped that I had truly accomplished the order.
I made a decision to examine my spam or junk folder. And guess what – there it was. Sigh.
I think about I’ll be ordering from this service provider once more, so I made a decision to whitelist their electronic mail deal with.
For extra on the what, why, and the way of whitelisting an electronic mail, learn on.
Desk of Contents
What’s a whitelisted electronic mail?
A whitelisted electronic mail is an electronic mail from a sender that the recipient designates as trusted, permitting messages from that deal with to bypass spam filters and be delivered on to the inbox.
Why whitelist emails?
As a recipient, you’ll need to whitelist the sending deal with of individuals and types that you simply belief – whose messages you need delivered to the inbox, to not the spam folder.
This might embody:
- Household and mates.
- Colleges, church buildings, volunteer organizations, and different establishments.
- Utilities, mortgage corporations, and others who ship you payments.
- Publications that ship you alerts and newsletters.
- Native and nationwide companies that you simply buy from.
- Others whom you work together with through electronic mail.
The excellent news is that it’s comparatively simple to white listing an electronic mail sender. Step-by-step instructions for find out how to do it comply with.
The precise course of varies based mostly on what you utilize to learn your electronic mail; we’ve got detailed directions for:
- Gmail
- Outlook
- Yahoo
- AOL
- Apple Mail
- Home windows 365 Desktop
- ProtonMail
Why immediate your subscribers to whitelist your electronic mail?
Now, let’s placed on our electronic mail marketer hats.
Lots of my shoppers ship electronic mail newsletters – a few of them are subscription-based, that means that readers pay to obtain them. And when a kind of lands within the spam folder as a substitute of the inbox? We normally hear about it.
It’s an occupational hazard of being an electronic mail marketer: Sooner or later, a message you ship will find yourself within the spam folder. It’s inevitable.
Everyone knows what it means when your electronic mail lands within the spam folder. Pictures are blocked, hyperlinks are disabled … however that isn’t the worst of it. Your electronic mail is far, a lot much less prone to be opened, learn, and acted on if it’s diverted to the spam folder.
And which means even in case you crafted an ideal topic line, wrote amazingly persuasive physique copy, and had a superb call-to-action, it doesn’t matter. The spam folder negates all that.
Right here’s the factor: Usually it’s not your fault when your electronic mail lands within the spam folder. You’ll be able to comply with best practices, keep your list clean, confirm that your email authentication protocols are in place and still have your email messages sent to the spam folder.
But there’s one more thing you can do to help ensure your emails reach the inbox: Ask your subscribers to whitelist your email address.
When an email address is whitelisted, messages sent from it are almost guaranteed to reach your recipient’s inbox – not the spam folder. When your readers whitelist your email address, it tells the algorithms that control inbox and spam folder placement that the recipient trusts you and that they want to receive email from you.
How to Get Subscribers to Whitelist Your Email Address
There’s only one way to get your email address whitelisted – you have to ask your subscribers to do it. This is true whether you are B2B, B2C, or something else.
A whitelist request used to be a standard part of the new subscriber onboarding process. You see it less these days, but it’s still a good thing to do to help your messages reach the inbox.
Here’s an example: A note like this would appear on a confirmation page when sign-up was complete and/or in the welcome email (feel free to copy this – the link will bring your subscribers back to this page for detailed instructions):
Thanks for signing up to receive email from [Your Brand Here]; please whitelist our sender address, which is [Your Sender Address] to be sure our emails reach your inbox. Not sure how to whitelist an email address? Here are detailed instructions from Hubspot.
Here’s an example from my inbox of a welcome message with a whitelist request in it. It’s pretty lengthy, and it appears in the middle of a long welcome email (see the arrow I added).

But whitelist requests aren’t just for onboarding. Many organizations include them in every message they send, as a consistent reminder to subscribers.
Once again from my inbox, here’s an example where it’s at the top of the message.

And finally, here’s an example where the whitelist message appears in the footer of each email sent (also from my inbox).

The exact wording of your whitelist request isn’t important, as long as it conveys:
- Why whitelisting is important.
- What email address should be whitelisted for your messages.
- How the subscriber can do it.
Some email tools will automatically whitelist email messages from senders in the recipient’s address book – but some won’t. That’s why the detailed instructions by email tool are so important.
1. Open settings.
To begin, you need to open your email settings. Click the gear icon in Gmail and select See all settings from the Quick Settings menu.

2. Navigate to “Filters and Blocked Addresses” in the top menu.

Once you’ve opened your settings, select Filters and Blocked Addresses on the top bar.
3. Select “Create a new filter.”
In Gmail, whitelisting an email actually involves creating a filter, so you need to select the Create new filter button.


4. Add a specific email or a whole domain in the “From” field.
Now it’s time to specify who you are whitelisting. You do this by entering in a specific email address (e.g., hello@domain.com) or a whole domain by omitting everything before the at symbol (e.g., @domain.com) within the “From” discipline.
The previous will whitelist one particular electronic mail deal with, whereas the latter whitelists anybody who’s sending emails from that area.


5. Click on “Create filter.”
From there, all you must do is click on the Create filter button on the backside of the window (subsequent to the blue “Search” button).

6. Test “By no means ship it to Spam” within the checkbox.
Clicking the Create filter button brings up a brand new window the place you truly specify what you’re doing with these emails. On this case, you’re whitelisting. In Gmail, you do that by ticking the By no means ship it to Spam field.
This may be certain that emails coming from the sender or area you specified by no means find yourself in Spam or Trash.

As you may see, you too can add different filters right here if they’re related to these electronic mail addresses.
7. Click on “Create filter.”
After you have chosen your filter, merely click on the blue Create filter button once more, and this creates the whitelist inside Gmail.
Notice: The default electronic mail supplier for Android is Gmail. Observe the above directions to whitelist emails in your Android gadget.
1. Go to settings in Outlook.

To start out, click on the gear icon in Outlook. When you choose it, a drop-down menu will seem and also you’ll select View all Outlook settings on the backside.

2. Choose “Mail” from the settings menu.

On the sidebar, click on Mail.
3. Select “Junk electronic mail” from the submenu.
After clicking Mail, a submenu particular to mail will come out. Select Junk electronic mail.
4. Click on “Add” below “Protected senders and domains.”

You’ll see the heading Protected senders and domains. Click on + Add to whitelist particular addresses and domains.
5. Enter the e-mail deal with that you really want whitelisted.
A discipline will seem beneath Add. Identical to in Gmail, you may both enter a particular electronic mail deal with (e.g., hi there@area.com) or an entire area (@domain.com).

6. Select “Save.”
Then click on Save. This may save your whitelist preferences and be certain that emails from these senders don’t find yourself in your junk electronic mail folder in Outlook.
Learn how to Whitelist an E mail in Yahoo
- Open Yahoo Mail and log in.
- Navigate to “Settings” then click on “Extra Settings.”
- Choose “Filters” and hit “Add new filters” to enter the e-mail you’d prefer to whitelist.
- Identify the filter and add the e-mail deal with.
- Choose to ship all mail to “Inbox.”
- Save your settings.
1. Open Yahoo Mail and log in.
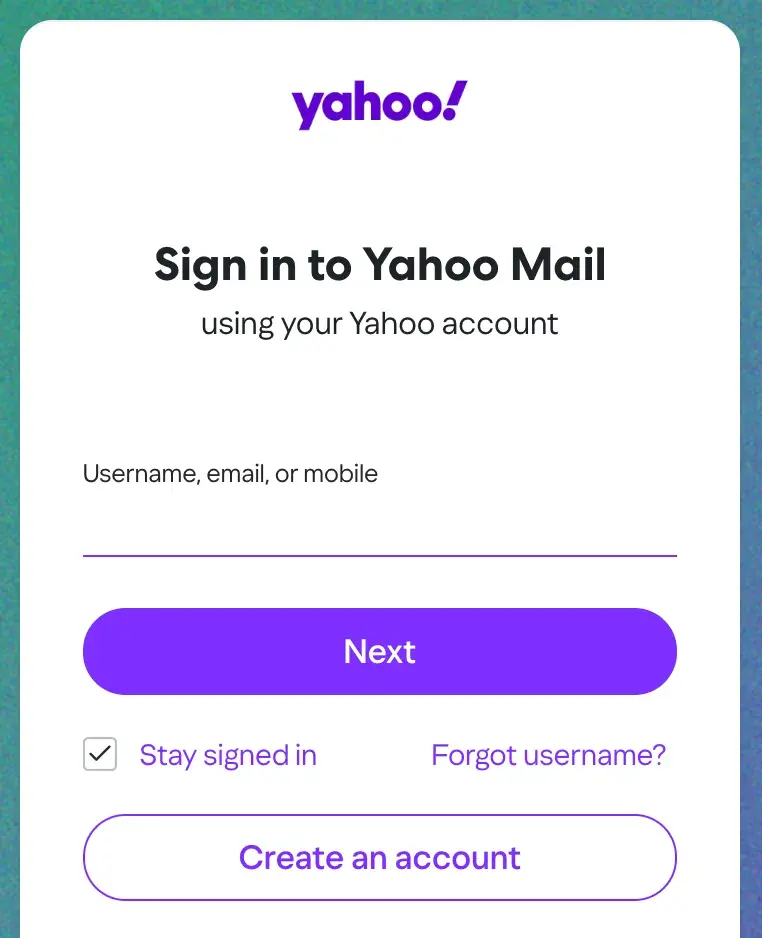
2. Navigate to “Settings” then click on “Extra Settings.”

Discover the gear icon, which is the settings menu. From the dropdown menu, choose the Extra settings possibility.

3. Choose “Filters” and hit “Add new filters.”

To whitelist emails on Yahoo, you might be truly making a filter. So on the sidebar, choose Filters and hit Add new filters to enter the e-mail you’d prefer to whitelist.

4. Identify the filter and add the e-mail deal with.
In Yahoo, you need to title your filter. I like to recommend one thing easy like “Whitelist.”

Then you definately set the rule to your filter. Since you’re making a white listing, choose comprises from the filter criterion listing.

After that, you simply enter the e-mail deal with or area within the textual content field.

5. Choose to ship all mail to “Inbox.”
To make sure these emails don’t go to spam or junk, choose the Inbox folder. This may ship all emails coming from the required deal with or area to your inbox.

6. Save your settings.
As all the time, you’ll want to click on Save so your new settings are saved.
Learn how to Whitelist an E mail in AOL
- Log in to your AOL account.
- Open “Contacts” from the left navigation pane.
- Click on the “New Contact” icon and add the e-mail deal with.
- Click on the “Add Contact” button.
1. Log in to your AOL account.

2. Open “Contacts.”
To whitelist emails or domains on AOL, you’ll truly be including a brand new contact. This may sign to the server that you simply belief the emails coming from these addresses.
So, on the left navigation pane, open Contacts.

3. Click on the “New Contact” icon and add the e-mail deal with.
Below Contacts choose New Contact. Enter the contact’s title and electronic mail deal with. You may as well enter a full area (e.g., @domain.com) to the e-mail discipline.

4. Click on the “Add Contact” button.
Lastly, simply click on Add Contact and also you’re all set.
Learn how to Whitelist an E mail in Apple Mail
- Log into your Apple Mail account.
- Click on “Mail” then “Preferences” within the menu bar.
- Click on on the “Guidelines” tab.
- Enter a brand new description and set the rule.
- Sort within the deal with and elect “Inbox.”
- Choose “OK” to avoid wasting.
1. Log into your Apple Mail account.

2. Click on “Mail” then “Preferences” within the menu bar.
Select Mail from the menu bar after which choose Preferences from the dropdown.

3. Click on on the “Guidelines” tab.
Below preferences, click on the Rule tab up high and select the Add Rule button from the sidebar.


4. Enter a brand new description and set the rule.
Enter the outline to your new rule. I feel “Whitelist” or “Whitelist Emails” are good descriptors.

Settings you must choose to make a whitelist rule can be “any,” “from,” and “comprises” — as you may see within the screenshot above.
5. Sort the e-mail deal with and choose “Inbox.”
Sort the e-mail deal with or area you need to whitelist. You’ll be able to add a couple of deal with or area at a time if you wish to apply the identical rule. Simply press the + signal subsequent to the textbox the place you entered the primary electronic mail.
Under, choose Transfer Message from the primary dropdown and select Inbox from the second.

6. Choose “OK” to avoid wasting.
And that’s it! Urgent OK on the backside right-hand nook will save your adjustments.
1. Open the Home windows Outlook 365 app.

2. Navigate to “Instruments” after which choose “Guidelines.”
Click on Instruments from the highest menu and choose Guidelines… from the dropdown.

3. Click on on “New Rule.”
From there, it would show the foundations you’ve created. If you happen to haven’t created any but, it would look clean just like the screenshot beneath. Click on the New Rule button on the underside left-hand facet of the display screen.

4. Identify your rule “Whitelist.”
You’ll have to title your rule. I like to recommend sticking with “Whitelist.”

5. Choose “From” and enter the e-mail deal with.
Subsequent, select From from the dropdown menu as your rule. Within the subsequent discipline, enter the e-mail deal with or area you need to whitelist.

6. Choose “Transfer to” and “Inbox” from the dropdown menus.
Now it’s time to decide on your motion. Within the first dropdown menu, select Transfer to and choose Inbox from the subsequent one.
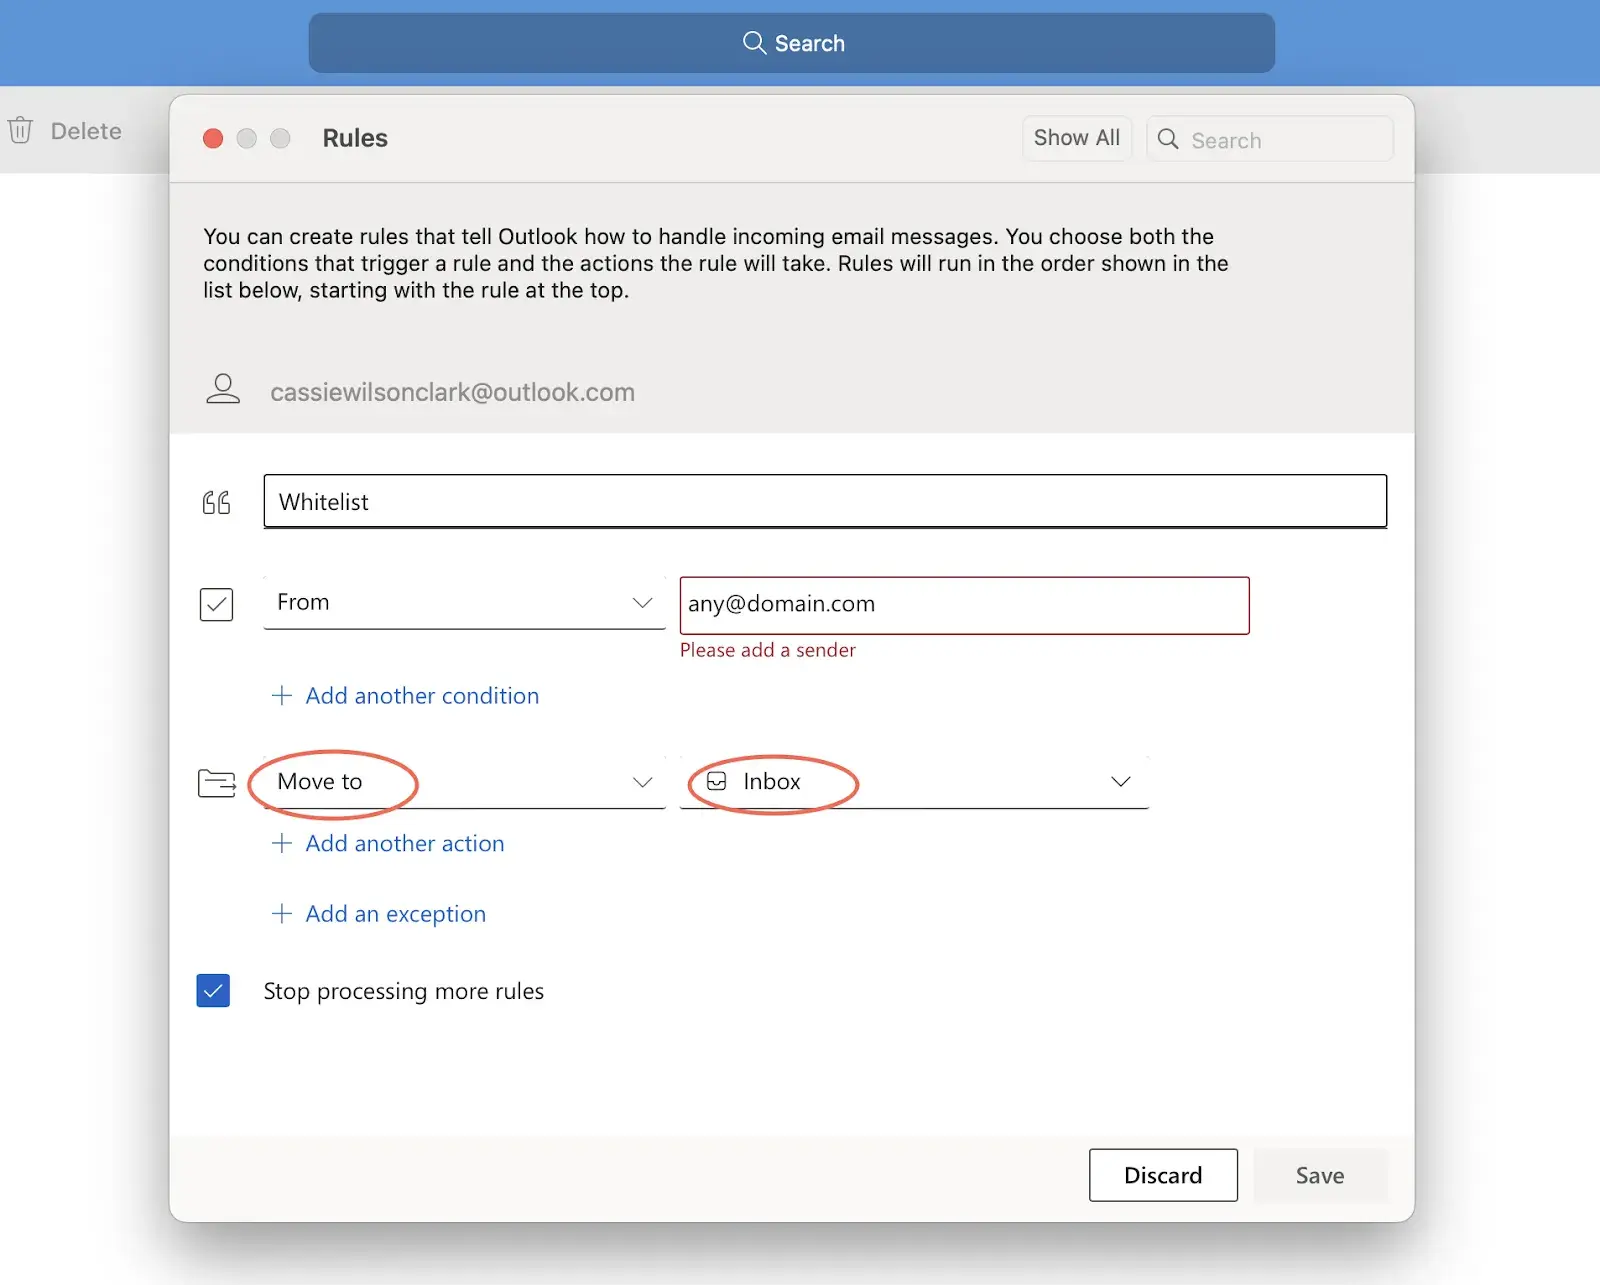
7. Click on “Save.”
To save lots of your settings, simply click on Save on the backside.
Learn how to Whitelist an E mail in ProtonMail
- Log into your ProtonMail account.
- Click on “Settings,” then choose “Go to settings.”
- Choose “Filters” from the sidebar.
- Click on the “Add deal with or area.”
- Choose both “E mail” or “Area.”
- Click on “Add deal with” to avoid wasting your adjustments.
1. Log into your ProtonMail account.

2. Click on “Settings,” then choose “Go to settings.”
Click on on the gear icon to open your settings choices and choose Go to settings.

3. Choose “Filters” from the sidebar.
Select Filters from the sidebar and search for the Span, block, and permit lists subheading.


4. Click on the “Add deal with or area.”
Below the Span, block, and permit lists subheading, click on on the Add deal with or area button. It’s going to open the dropdown menu, from which you need to select Permit.
5. Choose both “E mail” or “Area.”
Select both E mail or Area. Relying in your choice, you may enter the e-mail deal with or area you need to whitelist within the discipline field.

6. Click on “Add deal with” to avoid wasting your adjustments.
Clicking Add deal with will save your adjustments. Repeat this course of if you wish to whitelist a couple of sender.
Finest Practices Past Whitelisting
As talked about above, whitelisting is only one instrument to assist your electronic mail messages attain the inbox and be acted on. Listed here are a couple of extra assets I like to recommend that will help you enhance your electronic mail advertising and marketing.
Deliverability Suggestions & Practices
Whitelisting and different methods to get your emails delivered to the inbox as a substitute of the spam folder fall below an umbrella follow known as deliverability or inboxing.
Enjoyable truth: Deliverability seems like, however is completely totally different than, emails delivered or supply fee. The e-mail supply fee is calculated by subtracting the variety of bounces from the variety of emails despatched. An electronic mail will be “delivered” (that means it didn’t bounce) however not attain the inbox (as a substitute being diverted to the spam or junk folder, or simply blocked completely).
E mail Finest Practices
Just about the whole lot you do – out of your topic line to how the content material of your message is formatted – can influence your deliverability. Following greatest practices is a greatest follow for good deliverability.
Enjoyable truth: Your electronic mail ought to have fewer than three totally different typefaces. It’s not that having 4 typefaces or fonts will trigger your electronic mail to go to the junk folder, however fewer fonts will present a much less cluttered look, which can help in visible attraction and readability. And having individuals open and click on in your emails is engagement, which helps your electronic mail repute – and your deliverability.
Record Upkeep
Who’s in your listing, their relationship together with your firm, and the way they do (or don’t) interact together with your electronic mail messages have a huge impact in your deliverability. So do unsubscribe and spam grievance charges.
Enjoyable truth: High quality is extra necessary than amount. It sounds spectacular to have a big electronic mail listing, however what actually issues is how engaged your subscribers are, not what number of you’ve gotten.
A listing of 10,000 with a 20% open fee (2,000 opens) is prone to have greater deliverability than a listing of 100,000 with the identical 2,000 opens (a 2% open fee). It’s about engagement — often known as high quality, not amount.
Conclusion
Hey, you probably did it! You now know:
- What a whitelisted electronic mail is.
- Why, as a recipient, you’ll need to whitelist electronic mail senders.
- Why, as an electronic mail marketer, you’ll need your subscribers to whitelist your sender deal with.
- Learn how to ask subscribers to whitelist your sender deal with (with templated language and a hyperlink to this weblog put up that you should use to your personal messages and real-world examples).
- Learn how to whitelist an electronic mail sender in your electronic mail instrument.
- The place to search out another greatest practices for deliverability, past whitelisting.
I hope you had as a lot enjoyable studying this as I had writing it – as a result of electronic mail advertising and marketing is enjoyable and simpler if you comply with greatest practices in deliverability.
Completely happy sending!
Editor’s be aware: This put up was initially printed in April 2019 and has been up to date for comprehensiveness.

.webp)